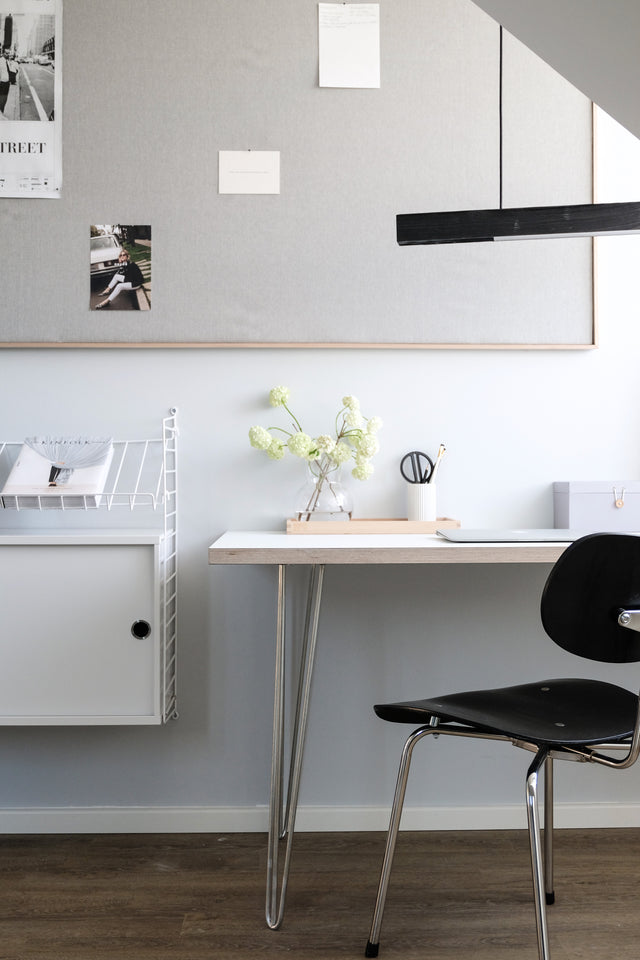
Do you know that feeling when you see a picture on Instagram or Pinterest and you immediately feel the urge to have it exactly like that? That's what happened to me with a picture that showed a glimpse into the office of a Danish designer. It shows her office, or rather her desk. A clean desk with a huge pin board above it. I immediately fell in love with this overly large pin board.

Even though you can save everything digitally these days, I'm still a big fan of having some things hanging in front of me on a pinboard. To have a complete overview and so on. You get the idea. And so it was pretty quickly clear to me that we wanted a pinboard like this above our desk in our office in the sky loft. Now I just had to convince my boyfriend.

Luckily, that was very quick, as he also thought the look was amazing. The next question was where we could get a pin board that was that big, that was exactly what we wanted. You can see from the wording that the answer can only be DIY. There was no way around doing it myself, as I knew pretty much exactly what kind of wood the frame should be made of and what kind of material I wanted to cover the pin board with.
You can find out how we went about making our 1m x 1.8m pinboard here:
Required material
- Wooden strips for the inside and outside, depending on the desired length (we took 3 long wooden strips each and sawed them off accordingly)
- cork panels
- 3mm hardboard for the back wall (we had it cut to the size of our pinboard at the hardware store)
- fabric (we chose upholstery fabric)
- saw
- stapler
- miter box
- clamps
- wood glue
- assembly adhesive

And that's how it works!
First, you need the wooden strips for the back. Measure these so that they are flush with the hardboard.

Now saw the wooden strip into the required lengths.

Use the wood glue to glue the wooden strip to the back of the board so that it sits flush. We used clamps to attach it. Please note: depending on the wood glue, the glue needs different amounts of time to dry.

Now repeat this for all sides.

Next, apply the mounting adhesive to the back of the cork panels and glue them to the entire front of the hardboard.

Now lay out the fabric and place the back wall in the middle with the cork panels facing down.

Now staple the fabric to the wooden frame.

Next come the wooden strips for the front. Mitre the strips to the desired length (45 degree angle).

Now glue each individual strip to the fabric using glue and press them together with glue clamps.


Et Voila! The homemade pin board is finished and I am happy!


It turned out exactly as I imagined it would and now there are a few notes, pictures and concert tickets hanging on it that were previously lying around the apartment. Sometimes making it yourself is the easiest and (most cost-effective) option. Oh, and last but not least, I wanted to point out that you can of course make a pin board in the size you want.