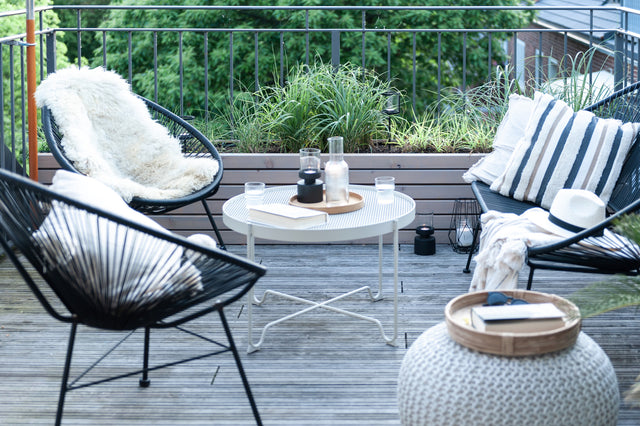
Spring is just around the corner and even though we are currently mostly staying at home (or have to), I think everyone can feel the tingling feeling that the first rays of sunshine bring with them. Hands up if you, like me, are looking forward to warm summer evenings with loved ones on the balcony or in the garden.
But before we can do that, we have to get our scrubbers out and give our outdoor room a spring clean. Mossy wooden floors and dirty outdoor furniture want to shine in new splendor as soon as the first rays of sunshine make it possible to sit outside. After all, we already cut back the plants in February so that they can grow back again.
One of the most frequently asked questions about our balcony is about our plant pots. When we were looking for possible pots last year, it quickly became clear that we would have to think of something ourselves, as we were not prepared to spend a four-figure sum on it. After a short time, we came up with the idea of building a flower box that would cover the entire width of the balcony, as well as a smaller one for the corner by the window. No sooner said than done!

Required material
- Wooden strips in the desired length (we decided to attach 5 strips on top of each other, so we needed a total of 20 strips)
- 4 wooden strips for the inside corners (as long as the box should be high)
- Small pieces of wood that all have the same thickness (to get the distance between the strips even)
- saw
- screws
- cordless drill
- drill
- tape measure
- clamps
- miter box
- wood drill
Let's go!
- Miter the strips at both ends (45 degree angle)
- Place the individual strips on top of each other and place the spacers between them


- If necessary, saw the strips for the inside a little shorter than the height of the strips lying on top of each other
- Mark the connection point to the outer strips on the inside strips (in our case there were 5 points)


- Drill through the marked points. Make sure your hole is slightly thinner than your screws.
- Screw the strips for the inside to the strips for the outside. Repeat this a second time so that you have two completely finished sides.

- Drill holes in your remaining strips. Make sure you are outside the miter.
- Screw the remaining strips to the already finished outer parts.


- If necessary, you can varnish the flower box. In this case, we used a grey wood varnish.


We then stapled pond liner in from the inside and cut small slits into it before filling in the soil.
That's it! Now our balcony has a harmonious look, just waiting for the sun to come out so we can enjoy our outdoor room to the fullest.